Showing posts with label Recipe. Show all posts

Monday, July 2, 2012

A Bumper Crop of Snow Peas


Every winter, during garden planning, I ask my husband what we should grow next year.

To which I get the same few answers: cucumbers, lettuce, cilantro and snow peas.

I think it's good to have a husband who knows what he wants; or at the very least, it's good to have a husband who knows what he wants in the garden. Garden planning gets a little easier when you have some standard vegetables that you know you will grow year after year.

I've had troubles in the past growing lettuce and cilantro, and this year, I've replanted my cucumbers three times. But so far, I've had really good luck growing snow peas.

And this year, we are getting a bumper crop of snow peas. Yahoo!


What do you do when snow peas start to cover your countertop? Eat them, and keep eating them because the pea plants are still flowering and producing new pods.

Get ready to eat them everyday, get yourself some friends who like snow peas, or get crackin' on filling up your freezer with 2012-grown veggies.

My favorite is to eat them fresh - even Briar the dog likes raw snow peas. But they also go great in stirfries with tofu and peppers, or you can make a cold snow-pea salad with peanut sauce.

Snow Pea Salad with Peanut Sauce

Wash and trim a large pile of snow peas.
Saute garlic, green onion and ginger in a small amount of oil in a large wok or skillet.
Add snow peas and saute for two minutes only - just to cook the snow peas a little bit to keep some of their crunch. (You could also add finely shredded carrot, peppers, cabbage, or other veggies at this time.)
Remove the wok or skillet from the heat, and stir in peanut sauce.
Transfer to a serving dish and put in the fridge to chill.

To make your own Peanut Sauce:

Put the following ingredients into a bowl, stir them together, and adjust quantities until you get something good.

Peanut butter - a few spoonfuls
Soy sauce - a small puddle
Very hot water - a small puddle (more if needed to thin to the desired consistency)
Rice wine vinegar - a few splashes
Simple syrup - a drizzle or two
Chili garlic sauce - somewhere between a pinch and a teaspoon (depending on how hot you like it)
Fish sauce - a splash

Sunday, April 1, 2012

The Last of the Dark Days

March 31st marked the end of the 2012 Dark Days Challenge. March was a tricky month for local eating, due to travel plans, work demands, and the onion box running low in the pantry. This weekend, I grabbed the very last yellow onion to throw together a quick lunch - my final Dark Days meal.

Pasta from the freezer, canned tomatoes and tomato puree and a yellow onion from the pantry, and a chunk of butter out of the fridge - that's all you need for a hot and simple pasta-with-red-sauce lunch.

Tomato Sauce with Butter and Onion
Adapted from Smitten Kitchen's version of Marcella Hazan's "Essentials of Classic Italian Cooking"

Dump a quart of canned tomatoes and a pint of thick tomato puree in a pot.
Drop in one half of a halved onion and a few tablespoons (3-5) of butter.
Heat up the sauce to a boil and then let simmer for 20-30 minutes.
Break up some of the tomatoes into more appealing chunks.
Spoon over just-cooked, still-warm pasta.

It's so good that we ate every bite before it crossed our minds to take a photo. Then, we were too eager to get back outside to do yard work to take a photo of our empty bowls. Spring is a good time - full of new energy and enthusiasm for any bit of green or glimpse of spring migrants.

Here's to the end of Dark Days, and to the start of the gardening season!

Monday, February 20, 2012

No Sap, but a Red Sauce (Dark Days 12)

Adam made his decision this weekend - no maple sugaring this year.
I'm a little disappointed, but at the same time, this has been a year without winter.
It doesn't feel right to celebrate the spring thaw when the winter hasn't frozen your soul stiff.

There are practical reasons as well to skipping the sugaring season; among the practical issues are that the sap barrel can't be kept cold with a blanket of snow and that we've already missed the early part of the run, which produces the lightest and prettiest syrup.

Instead of boiling sap, I tried my hand at boiling down tomato puree with some sugar, vinegar and spices to make a quick tomato ketchup. I adapted a summer grilling recipe to a "late winter/early spring/I don't know what season it is, but the chickens are happy to be outside" recipe boiled down on the wood stove. I'm calling this the heart of redness sauce, because the color turns out to be an impossibly deep red - primal and intoxicating like Joseph Conrad's novel.

Into the heart of redness - so tasty

The Heart of Redness Sauce - a winter riff on "Hot Tomato" Jam from James McNair

1 pint tomato puree (or unseasoned tomato sauce)
1/3 cup sugar
4 tablespoons minced ginger
2 tablespoons rice vinegar
2 dashes of Sriracha hot sauce (a.k.a. Rooster Sauce)

Mix up all the ingredients in a medium or large skillet. Stick this on the top of the woodstove, or on medium-high heat on your stovetop. Let it boil down 20-40 minutes, stirring occasionally, until you get a thick sauce that mounds up on your spoon. (Keep an eye on this, because it really depends on how thick your tomato puree or sauce is.) Take it off the heat and let it cool down to a manageable temperature for eating.

"a.k.a scrumptious"
This sauce is SO GOOD! We spread a thick layer on top of lamb burgers seasoned with black pepper, red wine, garlic and sesame oil. Adam gave the burgers and sauce a solid nine out of ten - a.k.a. scrumptious. That's pretty high praise, so I think you should try this at your house, too.

For Sunday dinner, we had lamb burgers with the heart of redness sauce, baked sweet potato fries and Empire apples. The Dark Days Challenge is starting to get a little more ingrained in my cooking. We pulled out some ground lamb from the freezer and I searched for a lamb burger recipe that would not require an additional trip to the grocery store.

Citing my local sources -
Ground lamb - Yankee Farmer's Market
Garlic and sweet potatoes - Spring Ledge Farm
Tomato puree - my garden and Musterfield Farm
Empire apples - Cardigan Mountain Orchard


Tuesday, February 7, 2012

Dark Days 9: Potato Leek Soup

February is fast-approaching, which means I've been thinking about onions.

Onions can be transplanted as soon as the ground can be worked in the spring, and you need about 4-6 weeks to grow onions from seed to transplanting size. This whole seed-starting thing is all about working backwards - you start at the date that you want to put your plants in the garden and subtract the appropriate number of weeks to find your seed-starting date.

In my case, I want to start my onions in mid-February, so that I can be prepared for planting out onions on April Fools' Day or shortly thereafter. I have a few raised garden beds that warm up and dry out well before the ground does, so I have been able to get peas and some cold-hardy transplants out in early April. 

Here's a great show-and-tell article from MOFGA about starting and planting onions. I had very little success growing onions last year, so I hope this year goes a little bit better.

It's good to have things to look forward to, especially when we've had more freezing rain than snow this winter. In the meantime, as I wait to pull out the grow lights and seed-starting mix, I've been cleaning the house and working on using up my stockpile of food from last season. 

I tried making soup again, as my last Dark Days soup was a dismal failure - and turned out a hearty and simple potato-leek soup. This soup is not much to look at; its resemblance to wall plaster is striking and somewhat unappetizing. But fortunately, it tastes really good!

The chickens prefer that we eat vegetable-based soups.

I used Deborah Madison's recipe from Vegetarian Cooking for Everyone, but this soup is so easy, I'm not sure you need a recipe, other than to get the proportions of leek to potato correct. I love easy.

Potato leek soup takes 7 ingredients - in order of addition to the pot, you will need butter, leeks, potatoes, salt, water, milk and pepper. If you do not have leeks, you can use scallions.

Locally-sourced ingredients:
Butter - Cabot Creamery
Leeks - Spring Ledge Farm
Potatoes - my garden
Milk - McNamara Dairy (purchased at Spring Ledge Farm)

Monday, January 23, 2012

Dark Days 8: Spinach Goat Cheese Flatbread and a Giveaway!

Now that the snow has finally arrived, I am in no rush to get back into the garden. Before it snowed, I felt like I should be doing some sort of yardwork, even though the ground has been frozen solid for weeks. Now, I am blissfully relieved of my obligations to do yardwork or compost-turning until spring comes.

Instead, I have turned my gardening attentions indoors - I am forcing some paperwhites and a red amaryllis to bloom indoors, and I'm trying to nurture the houseplants with a little more care than usual. Also, I've been doing my garden planning for the spring (click here to enter a giveaway for a seed catalog).

In the meantime, I can't live on the beauty of flowers and houseplants alone, so I spent a good amount of the weekend cooking. I am really fortunate to have Spring Ledge Farm's greenhouses so close to my house. They are open Friday afternoons and Saturday mornings through the winter, and their spinach is fresh, crisp and oh-so-very-green. For dinner last night, I made two small flatbread pizzas with garlic-infused olive oil as the base, and spinach, red onion and goat cheese on the top. That's a bit of grated Parmesan that you see in the photo - I'm trying to use up a last little bit of this cheese that has been "aging" in the fridge for months.

That's some creamy chevre.

Garlic-infused olive oil sounds really fancy, right? It's not hard at all and takes about 1 minute to assemble. 

Garlic-Infused Olive Oil -
Take a clove of garlic, smash it flat with the flat side of a knife, chop it finely and put it in a small cup or dish with some olive oil. When you're ready to assemble the pizza five minutes later, dump the olive oil with garlic chunks onto the dough and spread it around the whole pizza all the way to the edge. Also great with crusty bread or breadsticks.

Sources cited:
Pizza dough - Bread flour from Champlain Organics, honey from Cutting Farm, sugar, olive oil, salt, yeast from the grocery store
Red onion - Kearsarge Gore Farm
Goat Cheese - Vermont Cheese Company
Spinach - Spring Ledge Farm
Garlic - from Vanessa's garden
Parmesan cheese - originally from Wisconsin, it's been in the fridge so long, it might now be considered a local product.
Olive oil - Italy (definitely not local... but oh so tasty)

Monday, January 9, 2012

Dark Days 6: Tzaitziki Eggs

Gardens help us cultivate the idea of "Waste not, Want not" -

We can save seeds from one year to the next.
We can use mulch to save water and hours of weeding effort.
We can convert leaves, spent vines and other yard waste into compost.
We can give the unwanted caterpillars, slugs and kitchen scraps to the chickens.
We can collect used egg cartons and put new eggs in them to store, sell or share.

One of these things is not like the others.
I'm trying to bring that frugal ethic indoors this winter - specifically, to address the issue of food waste.

Like pinatas, New Year's resolutions are only made to be broken. So, this is more of an exercise than a resolution - just a thing to start doing and keep doing. In the summer, I typically end up cramming vegetables in every available cubic inch, so in winter, I certainly appreciate a clean and organized fridge.

I'm a pretty horrible housekeeper, so I can't give you much guidance on how to clean and organize your fridge, or create a weekly menu plan and matching shopping list. One thing that I do know --- if you do not eat your leftovers, the storage containers will start multiplying... rapidly...

To use up a bunch of odds and ends, I cobbled together a nice little dinner. I call this very successful experiment in leftovers... Tzaitziki Eggs!

Tzaitziki Eggs
Butter for the pan
A handful of minced onion
A few eggs
A sprinkle or two of feta cheese (I love feta with eggs - it's great.)
Tzaitziki sauce
-- Melt the butter, cook up the onion and add the eggs and cheese. Scramble this all together.
-- Scrape out onto a plate and top with tzaitziki sauce.
-- Finish with a few grinds of pepper. Taste this before you add salt, as feta can be quite salty.

Amazingly, I had minced onion, 4 eggs separated and chilling in little Pyrex dishes, leftover feta, and leftover tzaitziki. This required no cracking of eggs, no knife or cutting board - just a cast iron pan and a few grinds of pepper.

This is one of those dishes that you shouldn't knock until you try it - I am definitely going to make this again. This is definitely the lowliest of the low in terms of cuisine, but I believe you could transform this idea into a tasty Greek-style frittata for a classy Sunday brunch.

In case you do not have Tzaitziki Sauce lounging on the second shelf of your refrigerator, you can make this really fast. I call this recipe the Winter Version because true tzaitziki contains cucumbers - but  it's going to be six months before I see a local cucumber.

Tzaitziki Sauce (Winter Version)
1 cup of Greek yogurt (or regular yogurt drained in cheesecloth)
1 large clove of finely minced garlic
1 heaping tablespoon dried parsley
1 heaping tablespoon dried dill
-- Combine all ingredients; adjust seasonings to taste. Let sit for a few hours or a few days in the fridge to develop flavor.

Sources cited:
Butter and Greek yogurt - Cabot Creamery, VT
Onion and garlic - Spring Ledge Farm, New London, NH
Eggs, parsley and dill - my gardens and henhouse
Feta cheese - the grocery store (so probably the cheese is from Wisconsin)

In terms of local-sourcing this time around, I did pretty well - every thing was local except the feta. I have not found a reasonably-priced locally-produced feta cheese in the food stores that I frequent. Sounds like I need to research this more to track down some feta.

Monday, December 19, 2011

Dark Days - Spinach and Pasta

Spinach is a Holy Grail vegetable for me. I plant it several times a year (spring and fall) in a specially prepared bed, water it thoroughly, and generally try to pamper the baby spinach into succulent green leaves. But it never seems to get beyond the baby spinach stage without some sort of problem - bolting, turning yellow, freezing solid, wilting in a 90-degree day in early June, being eaten by a chipmunk. However, I can go to my local farmers' market and find the most soft and delicate full-sized spinach leaves from several different growers. Hope springs eternal - and maybe next year, I'll find the secret to growing spinach.

This week, I came oh-so-close to the Holy Grail of the Dark Days Challenge - the 100% locally-sourced meal. But true local cooking continues to elude me - utilizing local seasonings is really tricky for me.

Looks like a dog's breakfast - tastes much better

Spinach and Pasta in Cream Sauce
- another fast weeknight dinner -

Part One - The Pasta
Boil water for cooking fresh pasta.
Get started on Part Two while you wait for the water to come to a boil.
(If you're using dried pasta, you will need to adjust the timing so that the pasta and the sauce are both ready at the same time.)
Cook the fresh pasta for 3 minutes, drain and add to the saucepan.

Part Two - The Spinach and Cream Sauce
Meanwhile, chop two cloves of garlic and 1/4 of an onion and saute in butter in a heavy saucepan.
Add a big bag of spinach and saute this until the spinach wilts - I had to add the spinach in two parts because it wouldn't fit.
Scrape the vegetables out into the serving dish.
Add two tablespoons of butter to the saucepan and melt over low heat.
Add two tablespoons of flour and cook about 3 minutes, scraping the bottom of the pan constantly.
Slowly pour in one cup of milk and stir until the sauce thickens up slightly.
Add the vegetables back into the pan, turn off the heat, and stir to combine thoroughly with the sauce.
Season with chili-garlic sauce, lemon juice, salt and pepper.
(If the sauce is ready before the pasta, put a cover on the pan to keep the heat in.)

Sources cited:
Fresh pasta - Vermont Fresh Pasta
Garlic, onion, spinach - Spring Ledge Farm
Butter - my neighbor's pantry (yes, we ran out of butter - too much cookie-baking)
Flour - Farmer Ground Flour (Trumansburg, NY)
Milk - McNamara Dairy
Chili-garlic sauce, lemon juice, salt and pepper - the grocery store (non-local ingredients)

Saturday, December 3, 2011

Dark Days Week One - Cabbage and Sweet Potato Slaw

I had no idea until this year that you could grow sweet potatoes in New England. Sweet potatoes are a tropical root vegetable - not a cold-hardy friend of kale and red potatoes and other favored New England crops.

Like potatoes, sweet potatoes are not true roots like carrots or parsnips, but are tubers, underground stems that store starch. Unlike carrots and parsnips that are grown from seed, potatoes and sweet potatoes are grown from sprouted pieces of tuber. The "eyes" are clusters of buds, which will grow new leafy stems. Despite the similarity in common name, these two tubers are not closely related - sweet potatoes are in the morning glory family (Convolvulaceae) and potatoes are in the nightshade family (Solanaceae). They are both "New World" plants, native to the Western Hemisphere.

Apparently, it takes some trickery to make the sweet potato plants believe that they are living in a warm climate with a long growing season, rather than in Zone 5A... it's a matter of starting the sprouts indoors early until it heats up enough outdoors to plant them in the ground. The enormous sweet potato shown here was grown at Spring Ledge Farm a few miles down the road. A new crop for the list for next year - sweet potatoes!

On Tuesday, Adam and I cooked up one of our 20-minute go-to weeknight dinners. This dish doesn't really have a name - it's a skillet saute of cabbage, apple and bacon and whatever else you happen to have on hand, such as a gigantic sweet potato.

Still life with dinner and (some of the) ingredients

We were doing great with the local-eating challenge of Dark Days - (what's Dark Days, you ask?)
Bacon, slivered cabbage and sweet potato, sliced apples and caramelized onions fried in a cast-iron pan and sauced up with maple syrup boiled down from our sugar maple trees this March...
But then, Adam added some mustard, salt and wine to balance the flavors - not local ingredients.

I think this is pretty good for a first attempt, and actually, I was sort of impressed that we didn't need to use any oil or spices to make a really tasty dish. Of course, we could have used New Hampshire wine or hard cider and maybe next year, I could grow mustard, let it mature, harvest the seeds and make my own mustard using vinegar that I made myself. (That would be truly ambitious.)

Here's rough instructions on how to make this dish - I wouldn't call this a true recipe because it's a thrown-together dish with whatever you happen to have. It would be good with any number of sliced-up winter vegetables.

Cabbage and Sweet Potato Slaw

Fry up 1/2 pound of bacon; once crispy, remove from the pan.
Add 2 cups of thinly sliced or slivered sweet potato to the pan and brown.
Add 2 cups of thinly sliced or slivered cabbage and a thinly sliced apple; cook 2-3 minutes.
Add 1/4 cup of caramelized onions and a few tablespoons of maple syrup and grainy mustard.
Cook another minute, add a splash or two of wine and a sprinkle of salt.
Turn off the heat, add the bacon back to the pan, and toss so that the bacon gets coated with a bit of the mustard-maple sauce.

This is one of those dishes that doesn't look great, but tastes awesome.

Source citations:
Bacon - North Country Smokehouse
Cabbage and sweet potato - Spring Ledge Farm
Apple (a Calville Blanc d'Hiver) - Poverty Lane Orchards
Onion - Musterfield Farm
Butter (for caramelizing the onion) - Cabot Creamery
Maple syrup - the backyard
Organic mustard - no idea - it's made by Westbrae, which is part of Hain Celestial Group
Cheap white wine - somewhere in California
Salt - I do not know, but here's a map of all of Morton's facilities.

Tuesday, November 15, 2011

Food I Never Ate Growing Up: Brussels Sprouts

Last year, I wrote a post about Swiss chard, a leafy green vegetable that I never ate growing up... heck, I never even heard of Swiss chard until I was out of high school.

Brussels sprouts were another matter. I had heard of Brussels sprouts throughout my childhood. In children's books, movies and other incursions of pop culture, Brussels sprouts are often reviled and forcing children to eat them has been seen a cruel sort of punishment inflicted by their misanthropic parents. However, because my mom doesn't like Brussels sprouts, it meant that I never had to eat them as a kid. Phew - I was spared.

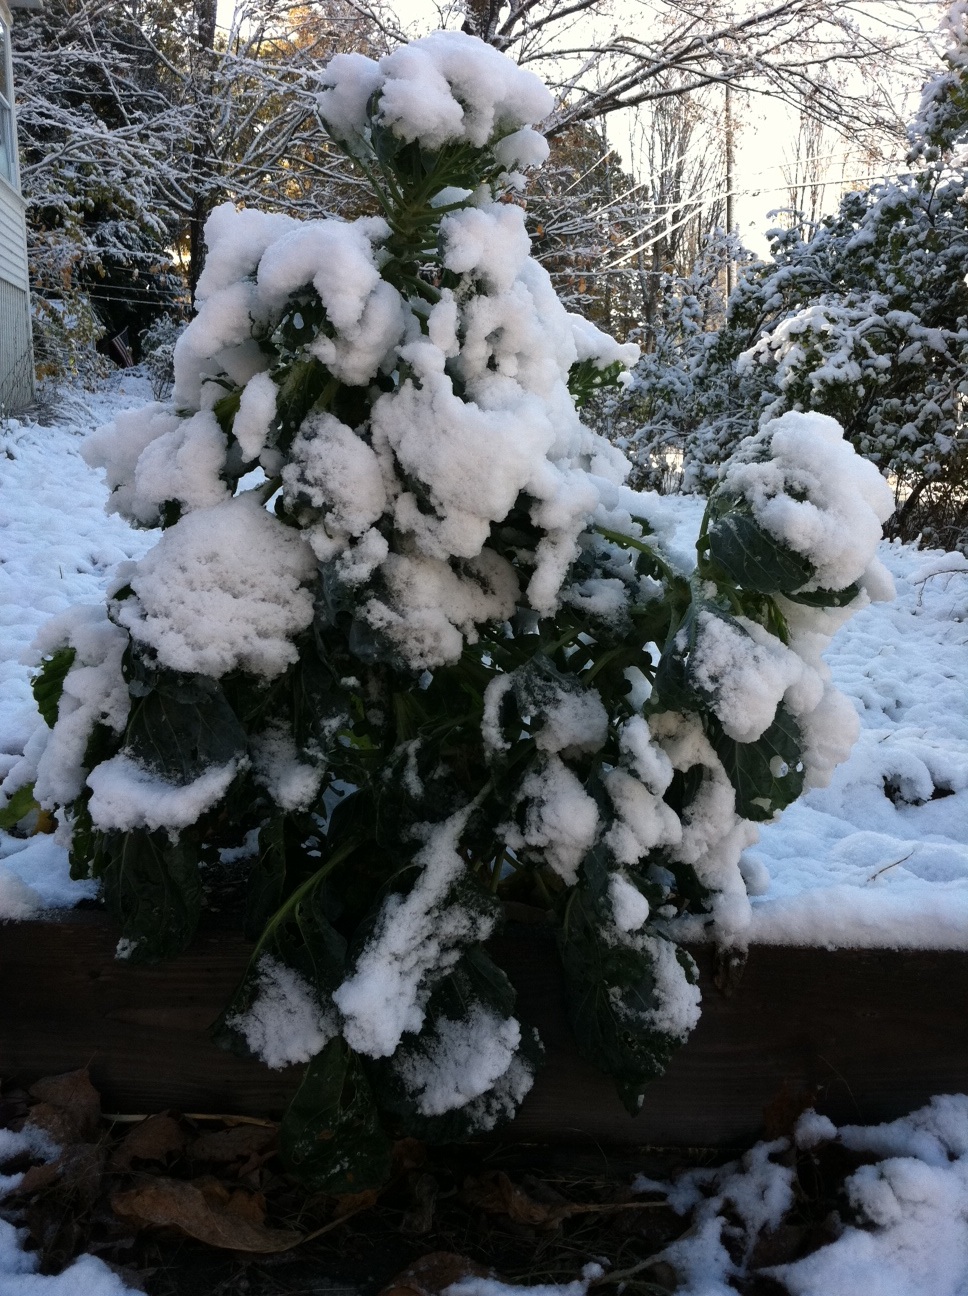
However, in the past few years, I have come to appreciate this wackiest member of the cabbage family. Brussels sprouts grow as little cabbages at the base of big cabbage-y leaves on a stout green stalk, which makes them visually arresting. They are also incredibly cold hardy - even our 12 inches of snow in October didn't phase them. Cold weather reportedly improves the sweetness of the sprouts, although I have not rigorously tested this hypothesis - I will pass on harvesting sprouts early to see if they are more bitter, I'll just wait.

Looks a bit like Christmas, eh?

Cooked properly, they lose any bitterness and sour cabbage flavor - and are instead a rich, crunchy green vegetable in a season where green seems a distant memory. I emphasize cooked properly - you want to make sure that the centers of the sprouts are fully cooked, otherwise you will have the full experience of bitter, sour cabbage. I would hazard a guess that poorly cooked Brussels sprouts over the years have contributed to their bad reputation in pop culture and conventional wisdom. Also, we've found that Brussels sprouts are something to enjoy in season (late fall and early winter) when their flavor is best - we have had bad luck with grocery store sprouts in late winter.

Here's Adam's favorite way to prepare Brussels sprouts and my favorite way to eat them - and this takes 15 minutes start to finish.

Pan-Roasted Brussels Sprouts
Heat a large saute pan or skillet with 2 tablespoons of butter or olive oil.
Add 1 pound Brussels sprouts, cleaned, rinsed and cut in half (or quarters, if they are very large).
Cook the sprouts over medium-high heat, stirring/tossing occasionally, for 10 minutes, or until you can easily poke a fork into the center of a sprout. The outer leaves and edges of the sprouts should be nicely browned and delightfully crispy.
For another test of doneness, try to squash one sprout piece with the back of a fork - if it yields with moderate pressure (i.e. doesn't collapse instantly and isn't a brick wall), you're on the right track.
Season with salt, pepper and a squeeze of lemon.

Raw sprouts ready for their hot butter bath

You could also cook these in the oven, but it takes longer and you can't fuss over it in the same way that you can with stovetop cooking. If you're into no-fuss and have the time, heat your oven to 400 degrees, toss the sprouts with olive oil and salt and pepper, dump them onto a cookie sheet, and bake for 40 minutes until the edges are crisp and the insides are creamy.

I will say that the kitchen can retain a certain cabbage-y odor after cooking Brussels sprouts, so I would recommend washing the pan as soon as possible and using the range hood over your stove top, if you've got one.

Saturday, September 10, 2011

You Know It's Summer When... You Eat Tomatoes Every Day


Fresh tomatoes are a pure summer delight. The flavor is sweet, the texture firm, and the colors stunning. Though early and late season varieties have been bred to extend the season for tomatoes - I particularly like the ambition of the variety named "Fourth of July" - tomato season in northern New England is a boom time of just one month. (Unless it's a late blight year, like 2009, where tomato season was a complete bust - but that's another story.)

While my first thought of tomatoes evokes Italy, tomatoes are actually native to South America and were cultivated in South and Central America as food crops. European explorers sent the tomato and its Solanaceae family cousins (potatoes, peppers and the important cash crop of tobacco) back across the Atlantic. The Italians and the Spanish embraced the tomato as their own, and in an interesting quirk of history, Americans did not start eating tomatoes until they became popular in Europe. (For more on this, check out this History Channel snippet - click on the picture of the tomato.)

It's the tenth of September now, and just this past two weeks, "all the lights are turning green to red." Unlike the David Grey song, tomatoes turning green to red means that you've got to kick it into high gear. While canning, freezing and drying tomatoes is an excellent way to handle your summer tomato harvest, you've just got to eat a lot of fresh tomatoes while they are at their most summery flavorful ripeness. Especially if you've stopped eating the bland, mealy supermarket tomatoes for the other 11 months of the year, it's practically mandatory to get in while the getting's good.

Right now, the getting is really good - and what's even better, you don't even have to work hard to appreciate the flavor and beauty of fresh tomatoes. I'd like to share 9 simple dishes featuring fresh tomatoes during this "what? more tomatoes?" end-of-summer time. I'm loathe to call these recipes, as there is so little work involved and there are no measurements - and the first doesn't even require a plate.

1) Eat cherry tomatoes by the handful, or eat a ripe heirloom tomato like an apple.You may want to eat the full-sized tomato outside because the seeds have a tendency to go everywhere.

2) Sliced tomatoes with a sprinkling of sugar. Sounds weird, but this was a favorite in my family growing up, and reinforces that tomatoes are indeed fruits, not vegetables.

3) Caprese salad - sliced tomatoes, sliced fresh mozzarella, and basil leaves. We typically dress this with some ground pepper, balsamic vinegar and olive oil over the top.

4) Halved cherry tomatoes mixed with creamy goat cheese and fresh herbs.

5) Oven-roasted plum, grape or cherry tomatoes. Slice in half, toss with olive oil, and put in the oven at 350 until the fragrance from the oven overpowers you (between 30 and 45 minutes, depending on the size of your tomatoes). This is excellent to put on top of a piece of meat.

6) Tomato-cucumber-feta salad. Sliced tomatoes and cucumbers with chunks of feta tossed with a little oil and vinegar.

7) Tomatoes with yogurt-dill sauce. Sliced tomatoes or whole cherry tomatoes served next to a dollop of Greek yogurt with fresh or dried dill, garlic powder and onion powder.

8) BLTs! This is the best use of those monster heirloom Brandywines or Cherokees where a single tomato slice will cover the whole piece of bread. This sandwich is so good that we actually made a special trip to buy Boston lettuce so that we could eat BLTs on the front steps on Saturday night.

9) Pa amb tomaquet - I think we are all familiar with Italian cuisine involving tomatoes, but how about a Spanish dish? Barcelona is a beautiful city with its own wonderful Catalan language, and a fabulous, dead easy dish called bread with tomato (pa amb tomaquet). Slice up a baguette or other crusty bread and toast it or grill it. Rub it with a clove of garlic - you want to get chunks of garlic into the holes of the bread. Rub it with a half of a tomato, scraping the tomato flesh into the bread until you have only the skin left. Brush or drizzle some olive oil and sprinkle with salt.

What's your favorite way to prepare fresh summer tomatoes?

Friday, July 29, 2011

Exotic Herbs - Chinese Parsley?

Common names of plants and animals can be funny, strange and confusing. Think of the groundhog, woodchuck, or whistlepig - all the same furry brown animal, all not pigs (or chucks).

Chinese parsley is another misnomer - you probably think you've never seen or tasted this herb, but oh, I bet you have. Does this look familiar?

Glossy green, serrated broad leaves - beautiful!
It's Coriandrum sativum - better known in America as cilantro!

I have no idea why this herb would be called Chinese parsley. It only vaguely looks like parsley, and no one would mistake the distinct flavor of cilantro for parsley. Wikipedia tells me that cilantro grows wild over a large region of southern Europe and the Near East - it seems to be certainly not a native of China.

Cilantro is also known as coriander, and the seedpods are often ground into coriander powder. I consider cilantro leaves and coriander seeds to be completely separate flavorings - the leaves are for Mexican and Latin American dishes, and the seeds are for Indian cooking. I'm sure there are plenty of other national cuisines that use cilantro in other ways, and probably a huge number of fusion dishes involving cilantro in either form.

I've had a difficult time growing cilantro - far more failed crops than successes over the past three years. But the successes are pretty fabulous, and with herbs, a little bit goes a LONG way. So even a meager handful of cilantro brings a ton of flavor and can fancy-up a basic dish.

Salsa that tastes like summer!

At a family party this Tuesday, I chopped up the leaves from 8 or so leaves of cilantro and mixed them in with a jar of Wegman's brand salsa. WOW - I was so surprised - the salsa went from run-of-the-mill blah-de-blah-blah to a fresh zinger that just begs for tortilla chips!

I highly recommend this as a quick recipe (a.k.a. a fixer-upper for grocery store food), because there's many times when 100% homemade is just not practical. This is perfect for last-minute get-togethers and hot, hot days of July and August.

Cilantro-fied Salsa
1 16-oz. jar of salsa (from the store or your own pantry)
6-10 stalks of cilantro, washed, stems removed

1) Dump the salsa into your fancy serving dish.
2) Finely chop the cilantro leaves. I like using the chiffonade technique, but another good technique is to use kitchen shears.
3) Mix about half of the cilantro bits into the salsa; taste and add more cilantro until you have the desired flavor. (I recommend this taste-and-add approach because too much cilantro tastes like soap to me - not a successful outcome!)
4) Put the salsa out with some chips, pour yourself a mojito, and kick back to enjoy the summer!

Thursday, July 14, 2011

Lettuce and Peas, an Early Summer Delight

A bouquet of fresh lettuce - lucky me!
Where I grew up, peas and lettuce were a springtime delicacy, enjoyed during the months of May and June. People typically started peas on St. Patrick's Day, and enjoyed peas in their pasta primavera during the season of primavera (spring in Italian). Not so in the land of New England - peas and full heads of lettuce are harvested firmly in the territory of summer, especially when the spring is a little on the wet and cold side. So, it's after the Fourth of July and the daytime temps and humidity feel like summer. But with peas and lettuce overtaking the garden, it still seems a bit like spring!

This week, the lettuce has succumbed to the heat and the peas are starting to go... but I've still got both peas and lettuce in the fridge, sustaining spring for a few more days.

A jungle of pea vines - see if you can spot the pea pods.

Peas can handle cool weather but not hot. The seeds go into the ground as soon as it can be worked in the spring, grow like crazy during warm spring days, and as soon as the temperatures start reaching 80 on a consistent basis, the leaves start to look a little peaked, and then a little yellow, and then it's time for the pea vines to go to the compost heap. Make way for the heat-loving peppers, tomatoes and eggplants.

Lettuce is similar - cool weather keeps it leafy and low to the ground, while hot weather triggers the plant to bolt, or to start growing upward to set flowers. Bolting also spurs the production of secondary chemicals, which render the leaves bitter and the sap milky. There are some lettuces that have been bred to handle hot weather, but the best season for lettuces is spring to early summer, yielding soft, mellow salad greens. When the lettuce gives up, it's time for plants that can take the heat - cucumbers, zucchini and summer squash.

Here's a simple recipe for snow peas - perfect for days that feel like summer!

Snow Peas with Garlic Scapes and Almonds

Heat olive oil in a pan with a bit of salt and pepper.
(For a little spice, add a pinch of crushed red pepper flakes.)
Add 2 cups of snow peas and 1/2 cup of garlic scapes; saute about 5 minutes.
Let the peas turn bright green, but still have their snap to them.
Then add 1/4 cup sliced almonds; saute for 1 minute.
Pour in a splash or three of a good aged balsamic vinegar; saute about 30 seconds more.
Scrape the pea mixture out onto a plate, and enjoy hot!

Thursday, April 21, 2011

Still.... Seeking Spring... Desperately

Guess what April showers have brought this year?
April SNOW!!

It has been spitting snow off and on, and everyone seems to be getting really tired of it. I was just at a meeting with a colleague who had dressed in well-coordinated, pretty pastels and then had to dig out her winter jacket. Fortunately, not all spring colors have to be covered over. The crocuses don't seem to mind the weather at all.


I snapped this shot of the crocuses near my office, not in my own garden. But I have spotted a few signs of spring from my garden, which I'd like to share with you:

Chives - These start growing immediately after the snowpack melts off, and cold weather doesn't bother this herb at all.

Daylilies - Even though they won't bloom until the summer, their green leaves pop up almost as fast as the chives.

Blueberries, lilacs, and crabapple - The buds are starting to show a little bit of green. And there was a small flock of juncos frolicking in the lilac hedge this morning.


I'll leave you with a recipe for a refreshing beverage that will get you excited about spring. Even if the weather seems more like winter.


Lemonade with Maple Syrup

1) Dig through your produce drawer and pull the lemons from underneath the parsnips, onions and other root vegetables. They are under there somewhere... I promise.

2) Juice the lemons into a pitcher and try to get as much pulp out into the pitcher. If there is not too much pith, you can peel the lemon and throw the pulp into the food processor.

3) Pour in maple syrup and stir up it well. Add water and ice cubes. Take a few taster sips to adjust the sweetness and intensity to your liking.

Thursday, January 6, 2011

Clark's Memorial Salad

Wintertime is a bit slow for gardening, a bit short on daylight and a bit long on cold windy nights that are uninspiring for evening walks. But inspiration never rests! In the winter, I find that inspiration follows us indoors, particularly into our kitchen, transforming our everyday meals into something a little special and our special occasion meals into an adventure.

And by adventure, I do mean the kind of meal where you try something you've really never ever tried before that has the potential to cause bodily harm. Like smoking sweet potato/white potato mash in an applesauce (chinois) sieve and a canning kettle. Unfortunately, I do not have photos from this because I was too busy trying to escape the smoke that completely filled the kitchen. The smoke eventually emptied the room after opening all windows and the exterior door, but it remained infused into the root vegetables and tasted amazing! I must thank Kelley Flynn, chef at the Palette restaurant, for explaining how one might go about infusing smoke into a vegetable. He prepares an delectable smoked parsnip and potato mash at his restaurant. I wish we had learned that trick last year, when we were inundated with root vegetables from our winter CSA.

It is important to recall the dark days of winter and any inspirational recipes when planning for next year's garden. We were fortunate to have sweet potatoes and white potatoes available from local farms, but parsnips are significantly more difficult to find. Thus, parsnips are on my list of things to grow next year! I've been re-reading Eliot Coleman's book "Four-Season Harvest" and I'm newly inspired to try cold-hardy greens and to have Adam build me some cold frames. We love salads year-round and it would be a real treat to pick our own salad greens this time of year. Other gardening inspiration comes from having to buy shallots in the grocery store because my shallots didn't produce much at all this year - and oh! the grocery store shallots are enormous!


Tonight's inspiration came in the form of pickled eggs, much more mundane but still a little adventurous. I use a recipe adapted from the University of Georgia's National Center for Home Food Preservation - try the Dilled Eggs recipe.

I first became acquainted with the pickled egg at Clark's Ale House in Syracuse, New York. There was an excellent selection of beers but only two items on the menu at Clark's - pickled eggs and roast beef sandwiches with horseradish. I say "was" because Clark's Ale House closed its doors on September 25th, 2010 - we were very sad to hear of its closing.

So, in memory of our favorite drinking establishment in Adam's hometown, we put together the following recipe, the Clark's Ale House Memorial Salad:

Mixed salad greens, with sliced pickled eggs, grated horseradish cheddar cheese, shredded roast beef, finely sliced red onion and croutons tossed with a honey mustard dressing.

To make the honey mustard dressing -
3 parts Honeycup honey mustard dressing to 1 part olive oil to 1 part balsamic vinegar to 1 part water - blend together and toss with the salad.

If you can get it, enjoy your salad with any Middle Ages Brewing Company beer, which was always on tap at Clark's and brewed just on the far side of downtown Syracuse.

Thursday, October 28, 2010

What I do for fun on a Thursday night...

I had a hot date on Thursday night! With boiling chunks of apples - it was truly HOT.

I got home late from an information session about a land conservation campaign in our town, and then futzed around the house for a while, cleaning the kitchen and putting clutter away, and then...

I got this great idea that I would make applesauce! At 10:45 at night! After I had just cleaned up the kitchen! (I know I'm using a lot of exclamation points, but I must say I was positively giddy to make applesauce.)

Considering I usually try to go to bed by 10 and I hate getting the kitchen dirty immediately after cleaning it, this was a surprising inclination, but I decided that you're only 27 years and 11 and 3/4 months old once, so I sorted through a bag of windfall apples from Norway Hill Orchards that my parents picked last weekend.

I washed them, chopped them in halves or quarters, and filled up a heavy 10-quart stockpot.I added about a cup and a half of water, put the lid on, and stuck the pot on the stove for 25 minutes or so.

During this time, I wandered around the house some more and watched a bit of the documentary of "Guns, Germs and Steel"... it's like the CliffNotes version of the book. I also periodically wandered over to the stove to smell if the apples were cooking down.

When apples are cooking down, they release this amazing sweet flowery perfumey scent, completely unlike the tart flavor of raw apples. The stronger the scent becomes, the closer the apples are to becoming saucy. I think that the heady fragrance of apples cooking is really what enticed me to make applesauce so late in the evening, rather than the smooth sweetness of the applesauce.

Up to this point, I had used only your everyday ordinary cooking tools, but for the sauce-making, I pulled out my special cooking tool, a chinois sieve. It's basically a metal perforated cone that sits on a wire frame; you put the soft apples in it and use the wooden paddle that comes with it to force the applesauce through the holes. The stems, skin and seeds all stay on the inside of the sieve. Cool, eh? You betcha.


(Magalloway did not actually help with the applesauce straining; he couldn't quite figure out how to push the paddle around... He might have been more interested if it were salmon sauce.)

This applesauce went straight into the refrigerator, as I love warm applesauce with granola for breakfast this time of year.

** If you don't have a chinois sieve, you can peel, core and slice the apples and then just cook them down. No straining necessary, although you may want to use a potato masher. You can make chunky applesauce this way, but your applesauce will be yellow.

**Another option - if you want to keep the beautiful pink color (which comes from the skins), you can just chop and core the apples, cook them down with the skins, and then pour the whole mess through a colander. You'll probably need a wooden spoon or your fingers to help separate the skins from the flesh.

Tuesday, August 3, 2010

"Pickles are more nutritious than fresh cucumbers" - really?

The Internet is full of astounding information, some of which is true, some completely unfactual, and some that seems just a little odd.

Take NC State University's cucumber profile, for example. As quoted in the title of this post, this article includes a statement that pickles have more nutritional value than fresh cucumbers. Really?? Doesn't this fly in the face of raw foods being more healthful than processed ones?? This certainly deserves further examination.

I've always thought of pickles as a sort of junk food condiment - like ketchup, it's made from vegetables, but it isn't actually "good for you." I delved into some literature and online databases to find out more; perhaps my assumptions about fresh produce would be turned on its head.

The USDA has a very cool searchable online nutritional value database. I used this to compare the nutritional content of cucumbers to pickles, as well as the cucumber profile from NC State.

Since I'm not a nutritionist, I can't really interpret precisely how much better or worse pickles are than fresh cucumbers. I'd love to know if the brine makes pickle nutrients more readily absorbed into the bloodstream. But anyway, what I've found from my quick research project is that cucumbers are 95% water and have very few calories, and that pickles are 94% water, have very few calories and a lot of salt. There are some differences in the amounts of vitamins and minerals, but neither have high concentrations (except with sodium in the pickles.) Therefore, as a non-expert, I would conclude that they are about the same nutritionally speaking, except for the salt.

The American Heart Association recommends that we consume less than 1,500 milligrams of sodium per day. According to the USDA database, one 4-oz dill pickle contains over 1,100 milligrams of sodium. That's almost your whole daily allotment - wow!

Why is salt bad?? - Excess sodium intake is linked to high blood pressure and increased risk for heart disease and stroke, two of the top three leading causes of death in America, according to the Centers for Disease Control.

The bottom line: I intend to eat fresh cucumbers and also make pickles. The salt content of pickles will keep them as a tasty condiment to be enjoyed in small quantities, and the watery crunch of fresh cucumbers makes them perfect for main dishes and salads.


This really started off as a post about making pickles, but somehow I found myself in the middle of a huge digression.

Anyway, I made four different kinds of pickles on Sunday night, using up about 10 pounds of cucumbers. Half were from my garden and half from Musterfield Farm (we rode our bikes to the farmstand.) I'll let you know what I think of the results of this recipes as soon as I try them...

Here are the recipes:
Audrey's Refrigerator Pickles
Refrigerator Dill Pickles
Marisa's Garlic Dill Pickles - this is a truly great blog on canning!!

Bread and Butter Pickles (adapted from the Ball Blue Book)
-makes 4 quarts-
4 lbs cucumbers, run through the food processor into 1/8-in slices
2 lbs onions, run through the food processor into 1/8-in slices
1/3 cup salt (non-iodized)
-- Combine cucumber and onion slices in a large kettle, layering with the salt. Cover the top with ice and let stand 1.5 hrs. Drain, rinse, drain again.

2 cups sugar
2 Tbsp mustard seed
2 tsp turmeric
2 tsp celery seed
1 tsp ginger
1 tsp peppercorns
1 tsp allspice berries (at Adam's request - may add an interesting flavor, we'll see)
3 cups vinegar (I used white vinegar this time, but would normally use apple cider vinegar.)
-- Combine ingredients in a medium saucepan to make the brine, bring to a boil.
-- Pour brine on top of cucumbers and onions in the kettle. Bring to a boil.

Boiling water in a canning kettle
Sterilized quart jars with lids and rings
Chopstick, spatula or other wooden or plastic stick
-- Pack hot pickles and liquid into hot jars, leaving 1/4-inch headspace.
-- Run a chopstick around the outside of the jar, removing any bubbles.
-- Put on lids and screw on rings.
-- Process quarts in a boiling water bath for 10 minutes.
-- After the jars have sealed and cooled, put them in a storage area and wait 4-6 weeks for the flavor to develop.

Friday, July 9, 2010

My Antidote to 90-Degree Days


It's been hot here... I know that rural northern New England has it easy compared to urbanites in NYC, Philadelphia and DC. But still it's darn hot out.

It's been great for the weeds, most of the garden plants, but definitely hard on the peas. I've been working hard at doing very little, especially when it comes to moving around outside. But I've had to do a little bit of gardening...

Just to keep up with the cucumbers. In the first 9 days of July, I've picked over 2 pounds of cucumbers. It's even been too hot to do any pickling (and we didn't have any dill), so I took a cue from my childhood and made cucumber salad, very similar to how my mom makes it. This is a nice simple way to prepare cucumbers without needing to make a trip to the store. At some point, I'll have to try pureeing cukes up into a cold soup, but our blender has been dedicated to smoothie production.


The Cucumber Salad I grew up eating:
Cucumbers (1 lb makes enough for 3-4 servings)
Miracle Whip (for true childhood authenticity)
Milk

My version (for adults - kids may prefer the less tangy version.)
Substitute olive oil mayonnaise for Miracle Whip. (could also use yogurt)
Splash of white wine vinegar (I couldn't find the sherry vinegar)
Dried dill weed (use liberally)
Black pepper
(Salt, if you think you need it - taste it plain first)

Peel and thinly slice the cucumbers. In a bowl, scoop and plop two large forkfuls of mayo and pour in a small amount of milk and vinegar (1 Tbsp or so of eaach.) With the fork, mix together until smooth. Shake in 1-2 Tbsp dill and 1/2 tsp pepper, adjusting to taste - I prefer a lot of dill. Make sure the dressing tastes good now, as it's easy to distribute the flavors before putting in the cucumbers. Add the sliced cukes and stir together. I usually have to pull apart the cucumber slices by hand as they tend to stick together.

If you haven't already eaten the whole thing immediately, store this covered in the fridge for a day or two. It doesn't last terribly long as the cucumber will get soggy.

Saturday, June 19, 2010

Food I never ate growing up - Swiss Chard

When I was a kid, I was not a particularly picky eater and we had dinner table rules about eating vegetables, so I definitely grew up eating leafy greens, beans, peas, corn, tomatoes and a lot of other garden veggies. But when I got to college, all of a sudden the world of vegetables expanded and my new friends introduced me to artichokes, avocados, eggplant, mixed greens (the kind with bitter-tasting mustard greens), and olives that did not come from a jar labeled "Black Olives" or "Green Olives with Pimientos." Somewhere along the way I was introduced to Swiss chard, which is really one of the strangest veggies.

1. Its wildly colored stalks seem completely improbable, from a Mendelian genetics perspective.
2. You cook the leaves and the stalks separately and they both taste different.
3. How can something look so similar to rhubarb but instead be chard?
4. The Swiss are known for many things (cheese, the Alps, neutrality, anonymous bank accounts), but vegetable farming is not one of them. Turns out it's really from the Mediterranean.
5. Ever look at the seeds? Even these are strange.
6. Swiss chard is a beet. Seriously. (Cooperative Extension doesn't lie.)

After 2 years of planting chard seeds with zero success and the plants never surviving past the 2-inch stage, I have actually got 5-6 thriving chard this year. I started the seeds inside which may have contributed to their continued existence. I did just plant some golden chard seeds, so maybe those will survive as well. And while I still think chard is strange, I also find it strikingly beautiful.


I'll share my favorite recipe for swiss chard.

Steamed Swiss Chard Salad
Cut the leaves off the chard stems and cut the leaves into pieces.
Steam leaves until soft (about 3-5 minutes.)
Toss with olive oil, red pepper flakes, and a handful of pine nuts/walnuts.
Squeeze a lemon over the whole dish - I like it when some of the pulp falls into the salad.
Season to taste with salt and pepper.

Friday, June 26, 2009

Recipe: Arugula Omelet

I must say that I enjoy gardening almost as much as I enjoy eating... but eating does win out because gardening has time limits (i.e., daylight hours) and eating can be done at any time. When gardening and eating combine, it's really a wonderful thing.

Adam and I got to enjoy the first harvest from the garden on Tuesday. Concerned that the arugula was going to bolt once it stopped raining, I had picked most of it on the weekend, but had lost motivation to clean and cook with it. On Tuesday, we had run out of leftovers and needed something quick and easy using what we could dig out of the fridge --

thus - Adam cooked omelets with arugula, Swiss cheese, and mushrooms. (Adam's also had red onion.) I had forgotten how green-tasting arugula is - for looking a lot like spinach, the flavor is really quite different. I think it really tastes like eating a leaf, generally mild but leaving that little taste of bitter on the tongue.

Anyway, the omelets were so good that I failed to take a photo before consumption; I thought about it after the fact.

The recipe is something similar to the list below - as Adam did the cooking, I can't say for sure...
Eggs - whisk together
Mushrooms and red onion - slice very thinly
Swiss cheese - sliced from the deli, preferably
Arugula - wash, remove lower stems (below the leafy part), leave leaves intact

Pour eggs in pan, layer cheese and vegetables, and cook like an omelet.
Key to this recipe is layer the arugula in a thick layer, like it's the lettuce on a sandwich. That way, you get a lot of arugula with every bite.
Really, this is an arugula dish with a little bit of cheese and egg to hold things together. And it was fantastic.